Think of your photography website as your own digital studio—a space you completely own and control. It's the central hub for showcasing your best work, detailing your services, and booking clients without relying on unpredictable social media algorithms. With the right strategy and tools, you can create a professional website in just a few minutes.
Why Your Website Is Your Most Valuable Asset

Social media platforms like Instagram are great for exposure, but you’re essentially just renting space. Your account, followers, and content are all subject to algorithm changes, new policies, or even deletion without warning. Creating a photography website gives you a permanent, professional home on the internet that is 100% yours.
This digital studio becomes your single source of truth. It's where potential clients find reliable information about what you do, see your curated work, and get a feel for your style without the distractions of a social feed. This level of control is essential for building a serious, long-lasting business.
From Social Follower to Paying Client
Your website is the critical bridge that turns a casual follower into a paying client. Someone might discover your work on social media, but they will almost always visit your website to confirm you are a professional. A polished site instantly signals that you’re an established business owner, not just a hobbyist.
This is where you convert attention into actual bookings. That journey from "wow, cool photo" to "here's my deposit" depends on a few key elements working together:
- A Stunning Portfolio: This is your visual handshake. It needs to be a carefully selected gallery of your absolute best images, not a massive dump of every photo you've ever shot.
- Clear Service Pages: Don't make people guess what you offer. Clearly describe your packages, what’s included, and how your process works in simple, easy-to-understand language.
- A Simple Booking Process: Make it incredibly easy for someone to hire you. An integrated contact form or booking system removes obstacles and helps you capture leads before they lose interest.
Actionable Tip: Your website is your 24/7 sales representative. It works for you even while you sleep—showcasing your art, answering common questions, and guiding potential clients toward your "Book Now" button.
Making It Possible with Modern Tools
The thought of building a website can be intimidating, often bringing up images of complex code, confusing design software, and wasted hours. Fortunately, modern tools have completely changed the process.
With the Solo AI Website Creator, this whole process gets much simpler. Instead of getting bogged down in technical details, you just provide a few prompts about your photography style and business goals. The AI then generates a professional, attractive website structure for you in minutes.
This lets you focus your time and energy on what truly matters: your photography and your clients. The goal isn't just to build a website—it's to launch a powerful business asset without the traditional headaches, freeing you up to do more of the creative work you love.
Your Blueprint for a Client-Winning Photography Website
Before you upload a single photo, pause and plan. The difference between a simple online gallery and a powerful, client-booking machine is a solid strategy. A well-thought-out plan ensures every element—from the images you choose to the words you write—works together to attract and convert your ideal clients.
Jumping straight into building without a blueprint is like starting a photoshoot without checking your gear. You might get a few good shots, but you're leaving the best results to chance. This foundational stage is where you make the strategic decisions that will define your online success.
Pinpoint Your Ideal Client and Niche
Who are you really trying to reach? This is the most important question to answer. Get this right, and you'll build a website that actually generates business. The answer "everyone" is a guaranteed way to attract no one. You have to get specific.
Are you a wedding photographer targeting high-end, luxury ceremonies, or do you specialize in intimate, rustic elopements? Do you shoot crisp commercial product photos for tech startups, or is your sweet spot warm, lifestyle content for family-focused brands?
Your ideal client influences everything:
- Visual Style: A luxury wedding photographer might choose an elegant, minimalist design with classic fonts. A newborn photographer would likely use a softer, more playful aesthetic.
- Portfolio Curation: You’ll select only the images that communicate, "This is the work I want to do more of!"
- Website Copy: The language you use should resonate with your target audience, speaking directly to their needs and aspirations.
Actionable Tip: Think of your website as a magnet for your ideal client and a polite filter for everyone else. When the right person lands on your site, they should immediately feel like they've found exactly who they were looking for.
Curate a Knockout Portfolio
Your portfolio is not an archive of every photo you've ever taken. It’s a highlight reel, carefully designed to sell your services. Quality is far more important than quantity. A curated collection of 20-30 of your best images is infinitely more powerful than a sprawling gallery of hundreds of mediocre ones.
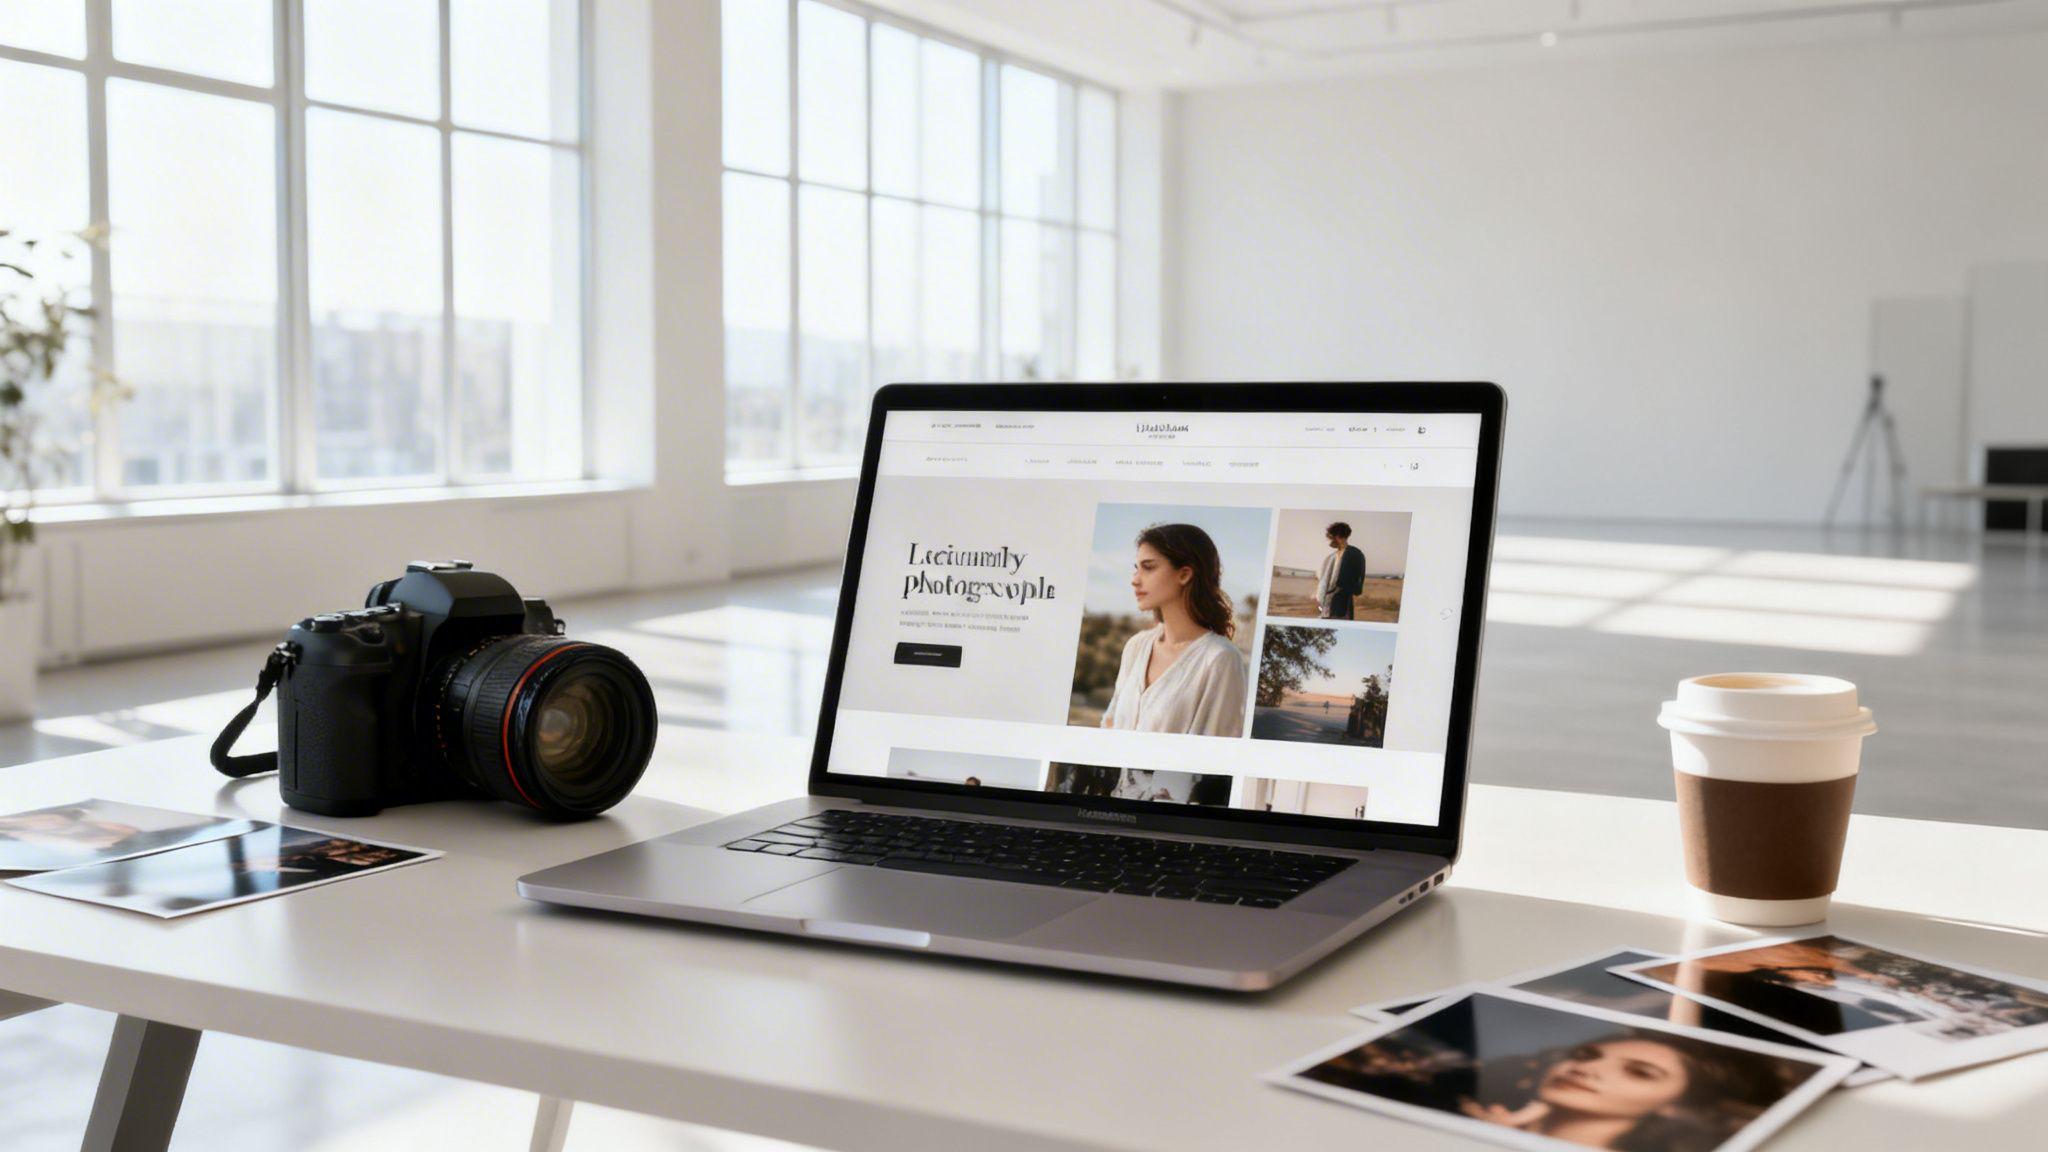
Here’s a visual to help you think about structuring your website's content and flow.

Just like the organized flow in this image, a well-planned website guides users logically from your homepage to your booking form.
To make your portfolio compelling, group your work into focused, easy-to-navigate galleries. For example, if you shoot both portraits and events, create separate sections for them. This immediately shows your expertise in specific areas and makes it easy for potential clients to find relevant work. Every image should tell a story and showcase the unique skill they'll be hiring you for.
Map Out the Client Journey
Imagine you are a potential client landing on your homepage for the first time. What should you see? What should you feel? What should you do next? Mapping this "user journey" is how you guide visitors smoothly from their first impression to the moment they book you. A crucial part of this is learning how to plan website structure for better SEO & UX.
This is about more than just pretty pictures; it’s about strategic flow. The global photographic services market is booming, projected to hit USD 48.91 billion by 2031. With digital platforms driving most of that revenue and 70% of consumers researching services online, a website with a clear path to booking isn't just a nice feature—it's essential for success. You can find more insights into the growing digital photography market on mordorintelligence.com.
A typical client journey might look like this:
- Homepage: Grabs their attention with a stunning hero image and a clear statement about who you are and what you do.
- Portfolio: Inspires confidence by showcasing your best, most relevant work. This is where they fall in love with your style.
- About/Services Page: Builds a connection and trust. You share your story and clearly outline your packages and process.
- Contact/Booking Page: Provides a simple, frictionless way for them to take the next step.
By planning this path from the start, you eliminate guesswork and make it incredibly easy for an excited potential client to become a confirmed booking.
Building Your Site with the Solo AI Website Creator
This is where your plan becomes a live, professional website—without the usual technical headaches. Using an AI-powered tool doesn't mean you lose creative control. It means you can translate your vision into a functional site far more efficiently.
Think of the Solo AI Website Creator as your expert web design assistant. You provide the core ingredients—your photography niche, your desired style, the clients you want to attract—and it generates a custom design to get you started. It’s all about clear direction, not complicated code.
From Prompt to Polished Website
Your first step is to describe your business with personality. Forget generic prompts like "make a photography website." Get specific.
Try something like this: "Create a professional website for a wedding photographer in Austin, Texas, with a romantic, light, and airy style. The site should feel elegant and trustworthy to attract high-end clients."
This level of detail gives the AI the context it needs to generate an appropriate layout, color scheme, and even starter text. From there, the process is intuitive. The goal is to get a professional site online quickly so you can get back to what you do best.
- Showcase Your Best Work: This is the fun part. The Solo AI Website Creator provides simple, drag-and-drop galleries. You can set up different galleries for each specialty, like "Weddings," "Portraits," or "Commercial," making it easy for clients to find what they’re looking for.
- Customize the Vibe: The AI-generated design is your foundation. You have full control to tweak colors, change fonts, and rewrite text to perfectly match your brand’s voice. Small adjustments can make a big difference in making the site feel uniquely yours.
- Add Your Essential Pages: Beyond your portfolio, you'll need pages like 'About Me,' 'Services & Pricing,' and a 'Contact' page. The AI can create drafts for these, which you can then personalize with your own story and details.
Activating Your Business Tools
A great photography website does more than look good; it works around the clock to get you clients. This is where you add features that turn your site from a simple gallery into a booking machine. You don't need to be a tech expert to do it.
Take a look at how these pieces come together to guide a visitor from browsing to booking.

As the visual shows, a successful site first tunes into the client's needs, shows them a perfectly curated portfolio, and then provides a clear path to booking.
Actionable Tip: Your website shouldn't just be a portfolio; it should be your automated assistant. By integrating booking and contact forms, you reduce administrative work and make it incredibly easy for clients to hire you the moment they are inspired by your work.
Connecting Your Professional Identity
Once your design is finalized and your galleries look amazing, it's time for the final touches that establish your professional credibility. Connecting a custom domain is non-negotiable for any serious photographer. Instead of a generic URL, you’ll have a memorable web address like yournamephotography.com that instantly builds trust.
Here are the key integrations to set up before you go live:
- A Seamless Booking System: This is a game-changer. Integrate a calendar or booking form directly on your site so clients can see your availability and book a session without endless back-and-forth emails. You capture their commitment when their excitement is highest.
- Simple Lead-Capture Forms: A clean, easy-to-use contact form is essential. The Solo AI Website Creator includes forms you can add instantly, so potential clients can ask questions, inquire about services, or request a custom quote.
- Your Custom Domain: The process for connecting your domain is straightforward and guided. This final step solidifies your brand and makes your website easy for clients to find, remember, and share.
This entire approach is designed to empower you. It removes the technical barriers that used to stand in the way, letting you launch a powerful, client-winning online presence in under an hour. You spend less time struggling with technology and more time behind the lens, creating the art that fuels your business.
Optimizing Images for a Fast and Findable Website

Your high-resolution photos are the heart of your business, but they come with a hidden cost: huge file sizes. If you upload them straight from your camera, you’ll end up with a website that loads painfully slow. That’s a guaranteed way to frustrate visitors and hurt your search engine rankings.
The key is to find the perfect balance between image quality and file size. This isn't about degrading your art; it's about making smart technical choices so your work can be seen by as many people as possible. A fast, beautiful website leads directly to more inquiries and bookings.
you need every advantage. The stock photo industry alone hit USD 4.34 billion in 2024, and with online marketplaces projected to capture over 63% of photography service revenue by 2025, a sluggish website simply won't compete. Your independent site must be fast and findable to stand out.
Choosing the Right File Format
Before you upload anything, you need to understand file formats. Simply put, these are different ways of saving your image. Picking the right one is your first step toward a fast website.
- JPEG (or JPG): This should be your go-to for nearly every photo you display. JPEGs are excellent at shrinking complex images—like portraits and landscapes—into much smaller files with almost no visible loss in quality. Make it your default.
- PNG: Use PNGs for one specific purpose: transparency. If you have a logo or graphic that needs a transparent background to sit over a colored section of your site, this is the correct format. For regular photos, PNGs create files that are too large.
- WebP: This is a modern format created by Google to be more efficient than JPEGs and PNGs. WebP files can be up to 30% smaller than JPEGs without sacrificing quality. The good news? Modern tools like the Solo AI Website Creator often handle this conversion automatically, serving the best format to each visitor’s browser.
Actionable Tip: For photographers, the rule is simple: use JPEGs for your portfolio. Only use a PNG when you need a transparent background. Let your website platform handle serving modern formats like WebP.
Compressing Images Without Losing Impact
"Compression" is just a term for making your image files smaller. For web use, a small amount of "lossy" compression—which intelligently removes data the human eye can't easily see—is essential.
Your goal is to get every image under 500KB, but aiming for under 250KB is even better. A 5MB photo from your camera can easily be reduced to 250KB with the right tools, and that difference can cut your page load time from seconds to milliseconds. Mastering how to optimize images for web is a critical skill for any photographer with a website.
To make this easy, use this checklist before you upload any image.
Image Optimization Checklist for Photographers
A simple checklist to ensure your photos are web-ready, fast-loading, and SEO-friendly.
| Optimization Step | Why It Matters | Easy-to-Use Tool |
|---|---|---|
| Resize Dimensions | Smaller dimensions mean a smaller file size. A 1500-2500px width is plenty for most web displays. | Your native photo editor (Lightroom, Photoshop) or a free tool like Photopea. |
| Compress the File | This is the most crucial step for reducing file size and speeding up your site. | Online tools like TinyPNG or Squoosh are fantastic and free. |
| Choose Correct Format | JPEG for photos, PNG for graphics with transparency. This ensures the best quality-to-size ratio. | Save/Export options in any photo editing software. |
| Name Files Descriptively | Helps Google and potential clients find you via image search. DSC_1234.jpg tells them nothing. |
Your computer's file manager. Just rename the file before uploading. |
| Add Alt Text | Crucial for accessibility (screen readers) and gives search engines context about your image. | The media uploader in your website platform (e.g., Solo AI). |
Following these steps for every image may seem tedious at first, but it quickly becomes a habit and has a massive impact on your site's performance and visibility.
Making Your Images Findable with SEO
Google Image Search can be a valuable source of clients, but search engines can't see your photos like people do. They rely on the text you provide to understand what an image is about. This is where a small amount of Search Engine Optimization (SEO) effort pays off.
For a complete rundown, check out our guide on how to optimize website images/. But if you only do two things, make them these:
Use Descriptive File Names: Before you upload, rename the generic file from your camera. Instead of
DSC_5821.jpg, change it to something a client would actually search for on Google.- Bad:
photo.jpg - Good:
austin-texas-wedding-photographer-first-dance.jpg
- Bad:
Write Compelling Alt Text: Alt text is a short, simple description of the image. It is what screen readers use for visually impaired visitors and what Google reads to understand your photo's content.
- Bad:
bride and groom - Good:
Bride and groom sharing a first dance at a rustic barn wedding in Austin, Texas.
- Bad:
This takes only a few extra seconds per photo but makes a world of difference in helping the right clients discover your work.
Marketing Your New Website to Attract Dream Clients
Getting your beautiful, fast-loading website live is a huge accomplishment. Take a moment to celebrate! But that’s just the first half of the work. Now comes the exciting part: getting your work in front of people who will actually hire you.
A smart marketing plan is what turns your online portfolio into a client-generating machine. You don't need a massive budget or an advertising degree. It’s about taking consistent, focused actions to build visibility and drive the right kind of traffic to your website. Your goal is simple: guide potential clients from social media to the place where business happens—your website.
Laying the SEO Foundation
Search Engine Optimization (SEO) sounds more complicated than it is. At its core, it's about making it easy for search engines like Google to find your site and show it to people searching for what you offer. The good news? The Solo AI Website Creator has built-in tools that make this simple, even for beginners.
Your first task is to write your page titles and meta descriptions. These are the text snippets that appear in Google search results. Think of them as free mini-advertisements for your business.
- Page Title: This is the clickable blue headline in search results. Keep it concise and include your main service and location. For example, "San Diego Wedding Photographer | Jane Doe" is far more effective than just "Home."
- Meta Description: This is the short paragraph of text below the title. While it doesn't directly impact your ranking, a compelling description convinces someone to click your link instead of a competitor's. Briefly explain what they'll find and why you're the right photographer for them.
Don't overlook these details. A well-written title and description can dramatically increase the number of people who click through to your site from a Google search, creating a steady stream of qualified leads.
Actionable Tip: Your page titles and meta descriptions are your first impression on Google and with potential clients. Craft them carefully inside the Solo AI Website Creator to tell everyone exactly what you do and where you do it.
Using Social Media as a Funnel, Not a Final Destination
Social media is excellent for building a brand and getting eyes on your work. But its real power is its ability to direct interested followers to your website. Stop thinking of your Instagram profile as your business headquarters; it’s a billboard that points traffic to your digital studio.
The digital photography industry is booming, projected to hit an incredible USD 168.93 billion by 2033. Platforms like Instagram are a huge part of that growth. But with 60% of web traffic coming from mobile devices, photographers who only rely on social media are leaving money on the table. A dedicated website with solid SEO is how you convert those mobile scrolls into paying clients. You can read more about the explosive growth in the digital photography market on skyquestt.com.
Here’s how to make your social media work smarter:
- Upgrade Your Bio Link: Your bio is valuable real estate. Make sure that link points directly to your website's portfolio or contact page.
- Create "Click-Worthy" Teasers: When you post photos from a new shoot, don’t share them all on Instagram. Post a few of the best shots and drive followers to your site with a clear call to action like, "See the full gallery from this stunning sunset wedding on my website! Link in bio."
- Use Stories and Reels: Use the "link" sticker in your stories to send viewers directly to your services page, a new blog post, or your contact form. This removes friction and makes it easy for them to take the next step.
Winning Locally and Building Trust
For most photographers, attracting local clients is the main goal. This is where local SEO is your best friend. The single most powerful action you can take is to set up and optimize your Google Business Profile (GBP). It's a free tool from Google that allows your business to appear in Google Maps and the local search results.
When someone in your town searches for "family photographer near me," a well-managed GBP is what gets you seen. Make sure your profile is 100% complete: business name, address or service area, phone number, hours, and—most importantly—a link directly to your new website.
The final piece of the puzzle is trust, and nothing builds it faster than client testimonials. They provide social proof that you deliver great results.
- Just Ask for Reviews: After delivering a gallery to a happy client, send a simple follow-up email with a direct link to your Google Business Profile asking them to share their experience.
- Showcase Them on Your Site: The Solo AI Website Creator makes it easy to add a testimonials section. Copy and paste your best reviews onto your homepage or services page. Let your past clients do the selling for you!
By combining these elements—foundational SEO, strategic social media, and a strong local presence—you create a powerful, sustainable marketing system. This approach ensures that when you're creating a photography website, you’re not just making a pretty gallery; you're launching a business ready to attract and book your dream clients. For more ideas, check out these 10 ways to promote your website after launching.
Your Burning Questions About Photography Websites, Answered
Even with a solid plan, you're likely to have a few questions as you build your website. That's completely normal. This is a big step for your business, and it’s smart to get every detail right before you launch.
Here are answers to the questions we hear most often from photographers.
"Can't I Just Use Instagram Instead of a Website?"
Instagram is like a billboard on the highway—great for getting attention. Your website is your actual studio, where you have serious conversations and sign clients.
On Instagram, your reach is controlled by an algorithm you can't influence. On your website, you own and control everything. It provides a level of professionalism, space for detailed service pages, direct booking tools, and a presence on Google that social media simply cannot match. Use Instagram to attract people, but guide all serious inquiries back to your website to close the deal.
"How Many Photos Should I Put in My Portfolio?"
When it comes to your portfolio, less is more. This is not a storage drive for every photo you’ve taken; it's a curated gallery designed to attract a specific type of client. A knockout collection of 20-30 of your best images will always be more effective than a gallery clogged with hundreds of decent ones.
Actionable Tip: Your portfolio should act as a filter. It needs to be so specific to the work you want that your ideal client sees it and thinks, "This is exactly what I'm looking for," while politely showing other types of clients that you may not be the right fit.
If you shoot in different genres, like weddings and newborn portraits, give each one its own dedicated gallery. This immediately positions you as a specialist and makes it easy for a potential client to see you as the perfect photographer for their needs.
"What's the Most Important Page on My Website?"
Your portfolio shows off your art, but your 'Booking' or 'Contact' page is what actually makes you money. This page has one job: make it incredibly easy for an interested person to contact you.
Keep it simple. Any friction or confusion here can cost you a client. Use a clean form—like the one included in the Solo AI Website Creator—and be clear about what happens next. A simple line like, "I'll get back to you within 24 hours," builds trust from the first click.
"How Often Should I Update My Site?"
To keep your website fresh, you should update your portfolio with new work at least once or twice a year. This shows visitors that you’re actively shooting and in demand. It's also an opportunity to replace older images with newer work that better represents your current style.
For a bigger impact on your SEO, consider starting a blog. You don’t have to post every week. One new post a month—a behind-the-scenes look at a recent session, a client feature, or a guide to local photo spots—gives Google new content to index. More importantly, it gives potential clients a reason to visit your site again, building a relationship before they even send an inquiry.
Ready to build a website that works as hard as you do? The Solo AI Website Creator gives you the tools to launch a stunning, professional photography site in minutes, complete with booking forms and SEO features. Start building for free and turn your passion into a thriving business.
Why is a photography website more valuable than relying only on social media?
A photography website gives you a permanent, professional home that you fully control, unlike social platforms that can change algorithms, policies, or visibility at any time. It becomes the reliable place where potential clients review your work, understand your services, and decide whether to book.
How many photos should go in a photographer portfolio?
A strong portfolio is a highlight reel, not a full archive. A curated set of about 20 to 30 of your best images is more persuasive than hundreds of average shots, especially when galleries are organized by specialty such as weddings, portraits, or commercial work.
What pages should a photography website include to win more clients?
A client-winning photography website needs a homepage, portfolio, about or services pages, and a contact or booking page. Together, these pages grab attention, showcase style, build trust, explain packages and process, and make the next step easy.
How do you guide visitors from browsing to booking?
Map the client journey so each page naturally leads to the next action. A visitor should land on a homepage with a strong first impression, move into a relevant portfolio, learn about your story and services, and then reach a simple contact or booking page without confusion.
What website features help photographers get more bookings?
The most useful features are integrated booking tools, simple lead-capture forms, and a custom domain. These reduce friction, let potential clients inquire or book while interest is highest, and strengthen credibility with a professional web address.
Why is image optimization important on a photography website?
Uploading large, camera-ready files can make your site painfully slow, which frustrates visitors and harms search visibility. Optimizing images preserves strong visual quality while keeping load times fast, helping more people stay on the site long enough to inquire or book.